Supplies:
Flat nose pliers
Wire cutters
round metal circle 40mm across (michaels has these) or make your own hoop with 26g wire
7- 8to9 inches pieces of silver wire 24g
38-42 count 4mm beads, your choice
 |
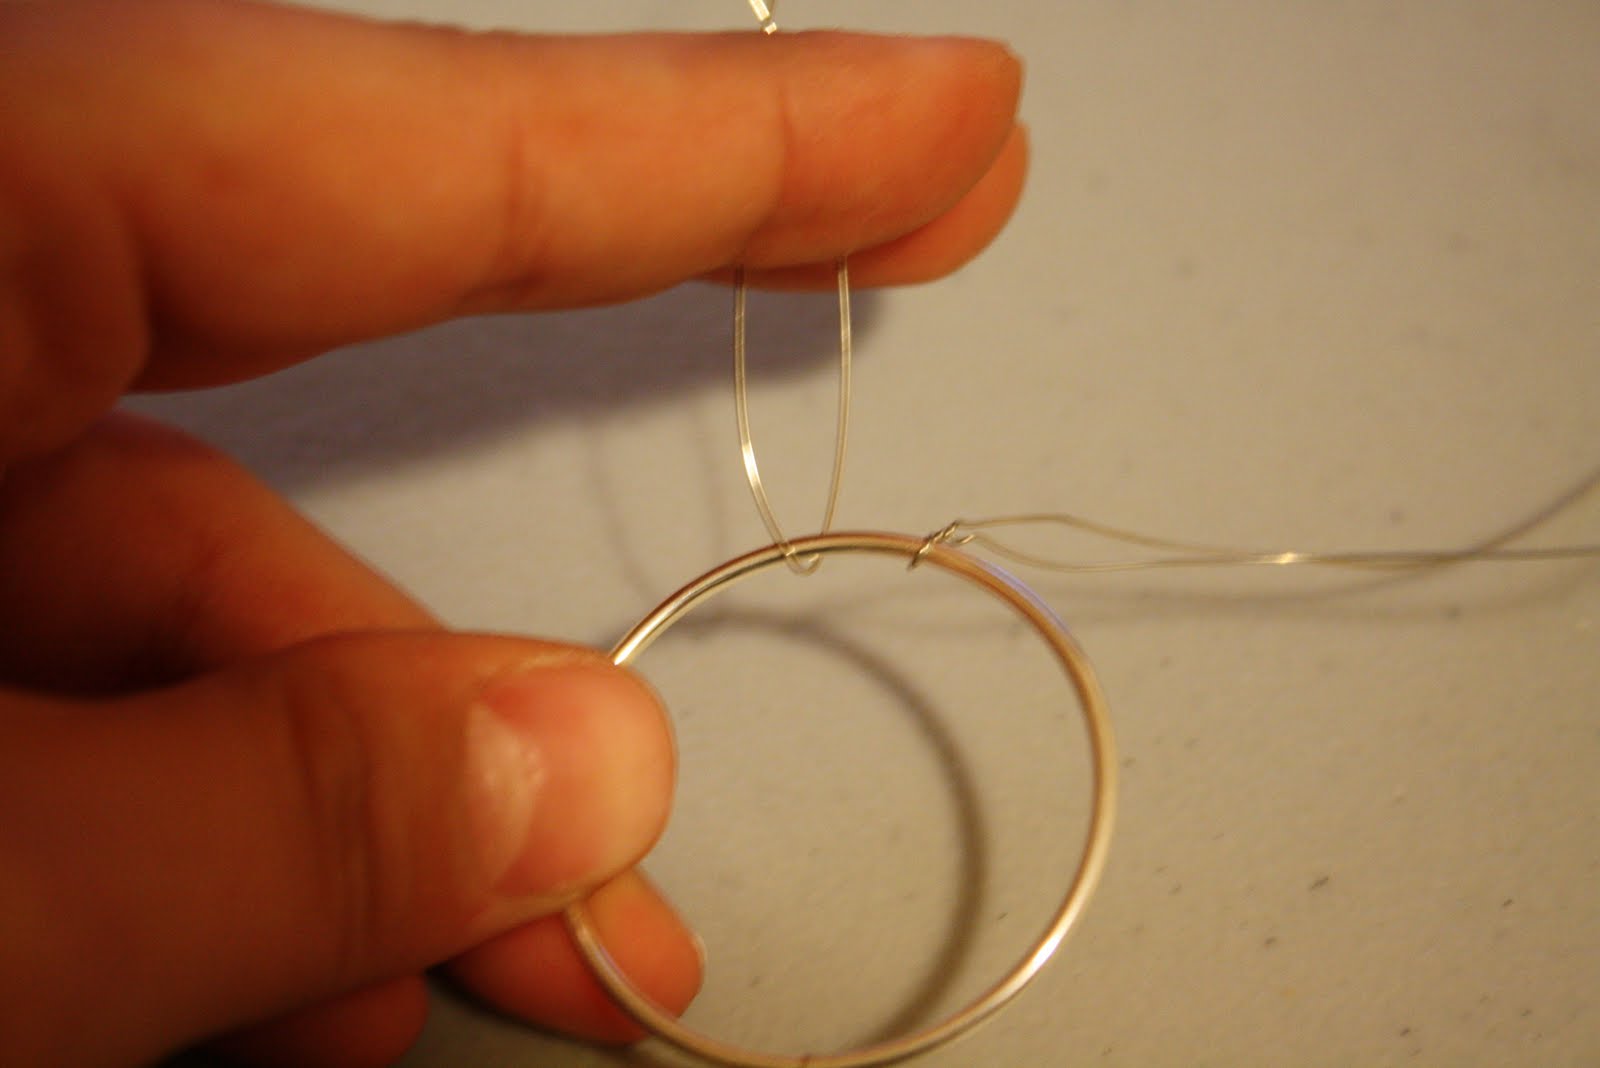
| 1. Grab one of your 8-9 inch wires and metal hoop. |
 |
| 2. Bend your wire in half. |
 |
| 3. Put hoop on either side of the bend wire |
 |
| 4. The wire should hold up your hoop and not fall. If this occurs your wires are not on either side of the circle. |
 |
| 5. Next twist the bent wire pieces together two times. Don't over twist. |
 |
| 6. Grab another one of your wires already cut and do the same thing that you did with the first wire. |
 |
| 7. After you have attached all 7 of the wires it should look something like this above. if it's messy it's no big deal! |
 |
| 8. grab one of the twisted wires and move the others away for this step. |
 |
| 9. I did 3 beads on one wire and 2 on the other. |
 |
| 10. Push the 5 beads all the way down and touching the twisted part of the wire closest to the ring. |
 |
| 11. Now twist those two pieces together to keep the beads from falling down. Don't twist to tight. Also don't worry if its not in a straight line. Twist 5-6 times. If you go over it's no big deal. DO NOT twist all the way down. Leave room at the ends. |
 |
| 12. Next set of wires i place three beads on each wire. |
 |
| 13. Now twist these down and tight. |
 |
| 14. continue with three beads and then two beads on the next set. The fouth and fifth one i put three on each wire. the sixth i go back to 3 and 2 and the last one i do 3 and 3. |
 |
| 15. Next place the different section around the circle. |
 |
| 16. Grab two sets of wires, like above. You not going to be even, since there is only seven sections. |
 |
| 17. With those two section of wires twist those together until the twist almost touches the bottom of the wire circle. Continue pairing two together on the other sides. You will end up with one out and add that to either side that you choose. Wrap that odd one with the other two. |
 |
| 18. Put all the wires from the sections together and give it a couple good twists. This is going to be hard to do. You may use your flat nose pliers to help if you need to. |
 |
| 19. Spread out what i call the roots and split them into two sections on either side of the trunk. |
 |
| 20. That one section at a time and start wrapping it around the bottom on the wire circle. it's okay if it looks messy, roots are. After you have wrapped the one section around three times do the other side. |
 |
| 21. Cut off the extra wire from the "roots". Grab your flat nose pliers and make sure to tuck them in and flatten them down. this will prevent scratching or caching of clothes. |
 |
| 22. After you are satisfied with planting down the 'root's you are done. Enjoy your pendant. You can add a chain with this necklace. |
Awesome tutorial! Thanks so much for sharing!
ReplyDeleteSo lovely! Thanks for posting!
ReplyDeleteI LOVE this, I'm going to tweet it!
ReplyDeleteOh my word. That takes a lot of work! I have seen those for sale but had no idea how they were made. I think it takes a lot of talent for you to be able to do it!
ReplyDelete(Stopping by from the etsy blog team!)
That is beautiful! Thanks for the tutorial, great job.
ReplyDeleteThis tutorial is FAR better then the one's I have seen on UTUBE for this pendant!
ReplyDeleteThanks, I am adding this to my fav's :)
Oh wow! I don't make jewelry but just looking at this tutorial makes me want to make a tree of life pendant. Thanks for sharing this!
ReplyDelete